
12 Days of Christmas with LG,BE
Day 5:
I will be the first to admit that my first roast chicken experience was a complete failure. What day did it happen on, you ask? Why, only Thanksgiving! (Yes, I made chicken instead of turkey on Turkey Day since it was a humble company of two).
I learned a lot from the mistakes I made but the one thing that made me want to try again so soon was that the flavour of the actual chicken itself was PHENOMENAL.
As soon as you learn how to master a chicken, it really changes the chicken game in your household. Not only is the entire bird cheaper than purchasing only chicken breasts, thighs, or drumsticks on their own, but the versatility of what you can do with the whole chicken obviously expands too.
Let’s get down to business.
INGREDIENTS
| ROAST CHICKEN | GARLIC THYME COMPOUND BUTTER |
| 1 whole chicken 1 onion, quartered 2 carrots, chopped into 3-inch chunks 2 stalks of celery, chopped same as carrots 1 leek (optional, I threw it in since it was in my produce crisper) 1/2 lemon, quartered Fresh thyme sprigs 1 cup of dry white wine or low-sodium chicken broth + Salt and pepper | 3/4 cup of unsalted butter, room temperature 4 cloves of garlic, minced 1 tbsp of fresh thyme, finely diced Zest of 2 lemons |
HOW TO COOK A WHOLE CHICKEN CHEATSHEET
(stuffed or unstuffed)
| Weight (lbs) | Oven Temperature | Cooking Time (hours) | Internal Temperature |
| 2 to 2 .5 | 325 ºF | 1.5 | 180ºF to 185ºF |
| 2.5 to 3 | 325 ºF | 2 | 180ºF to 185ºF |
| 3 to 4 | 325 ºF | 2.5 | 180ºF to 185ºF |
| 4 to 6 | 325 ºF | 2.5 – 3.5 | 180ºF to 185ºF |
- Preheat the oven to 325ºF. Consider making the compound butter first by combining all ingredients together and putting off to the side. This butter truly brings so much flavour to the entire chicken, so don’t feel bad and try to skimp on less butter.
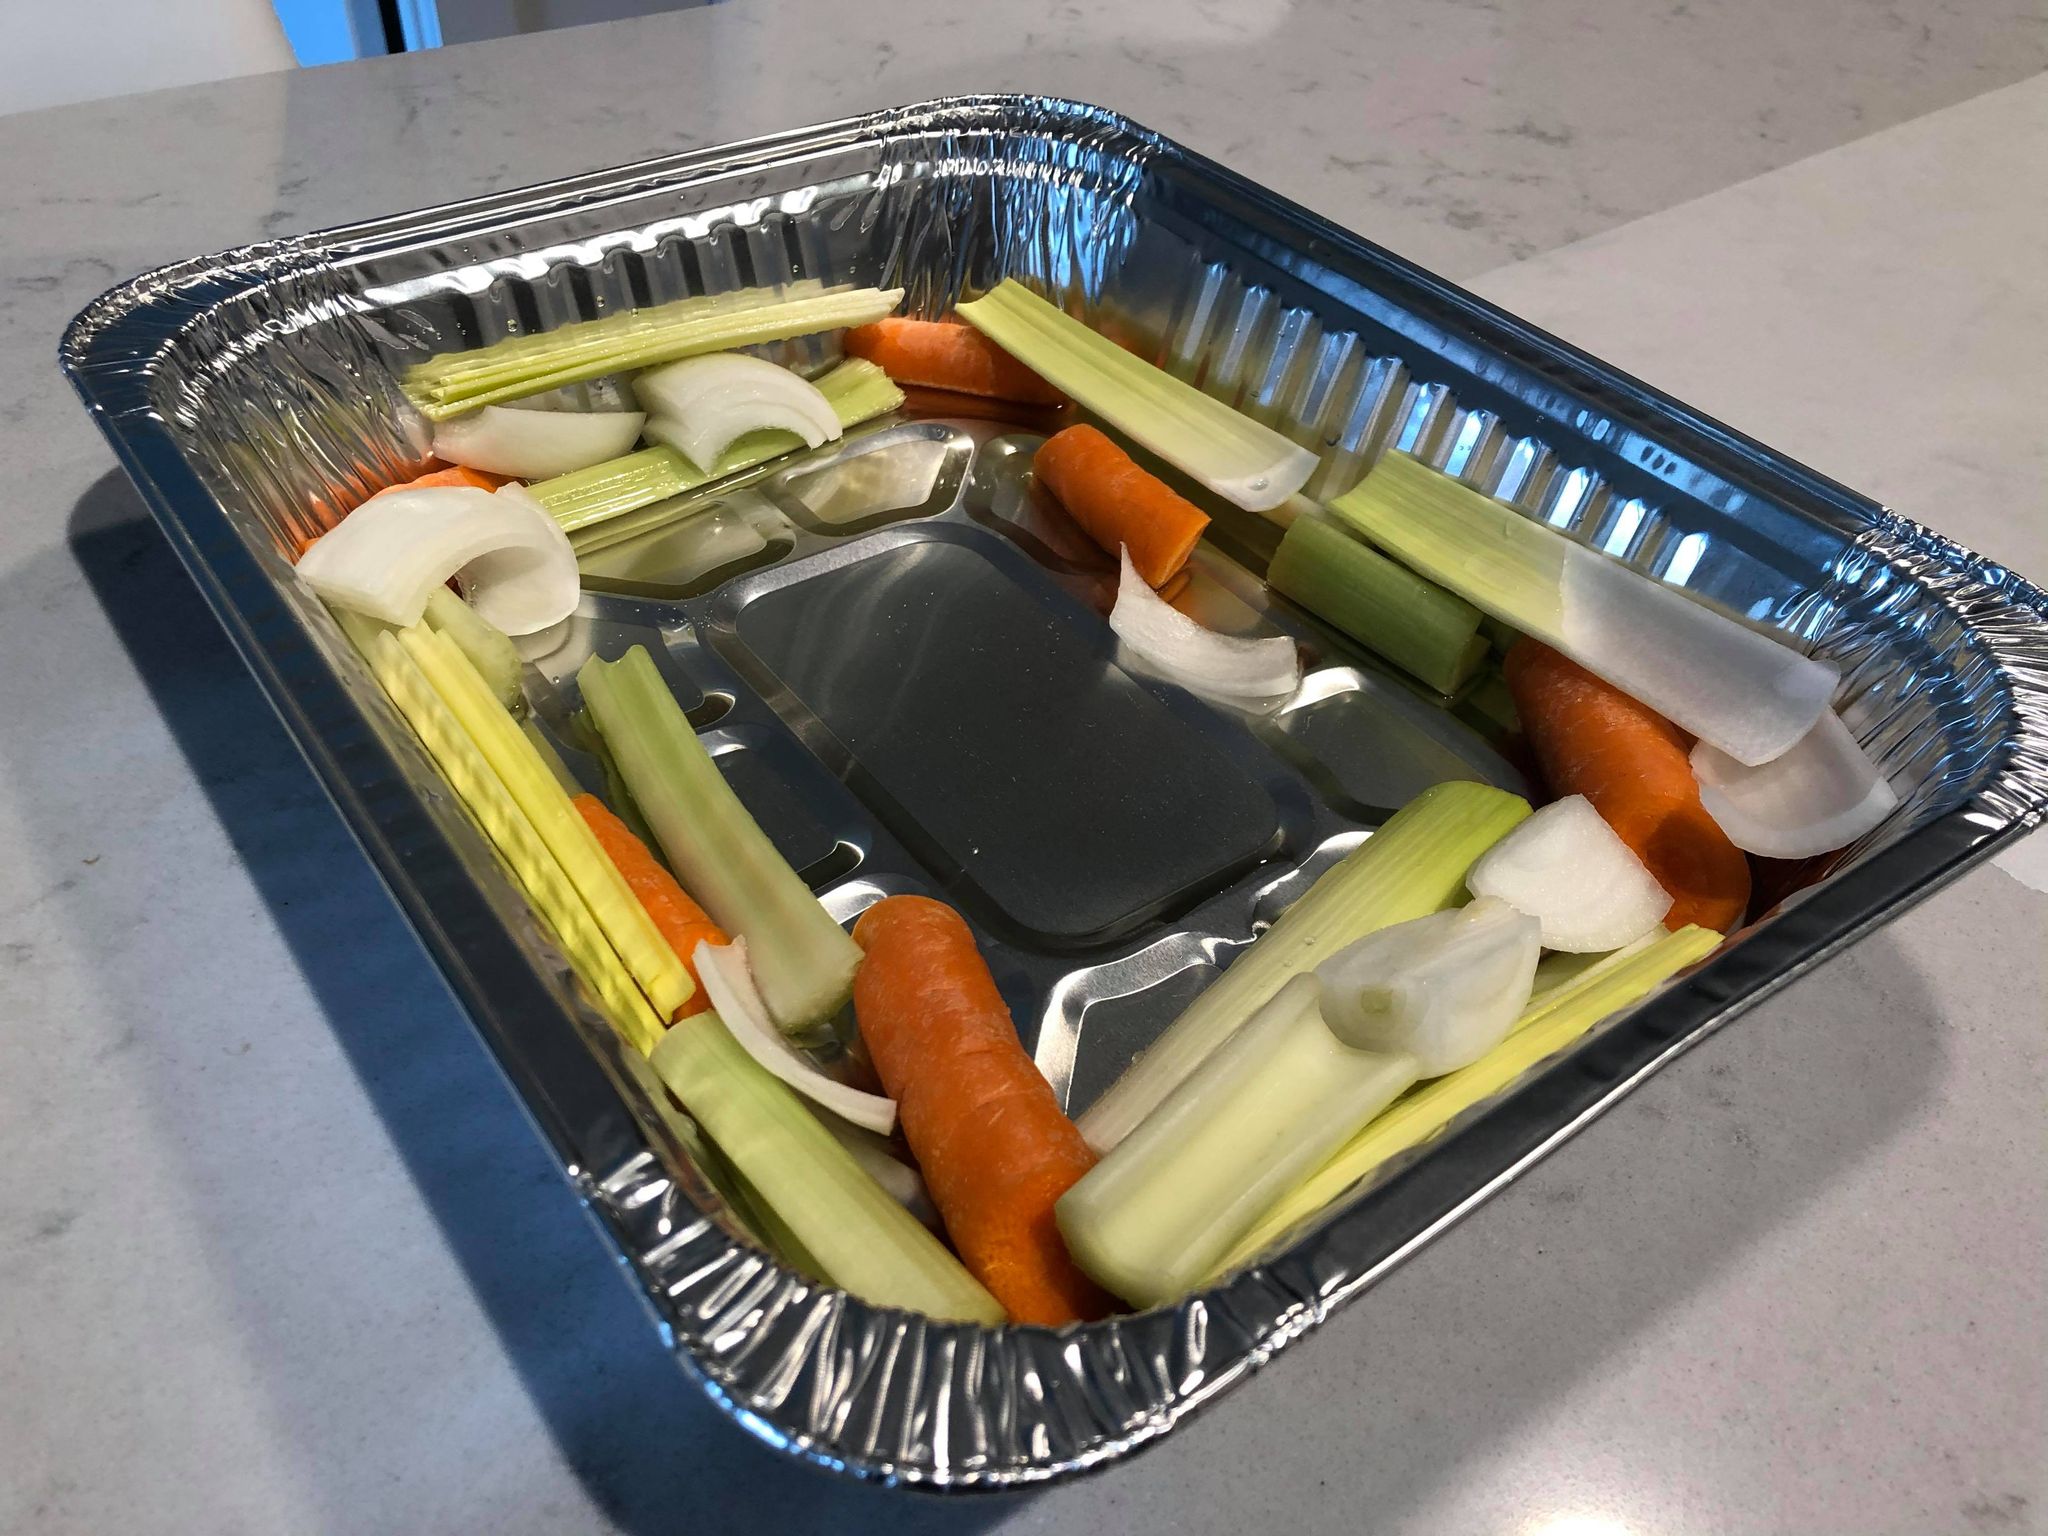
2. In a roasting tray, spread the onions, carrots, and celery and the white wine/chicken broth at the bottom and leave space for the chicken. in the middle On a clean cutting board, remove your whole chicken from the packaging and cut through any ties holding the legs of the chicken together. Pat the chicken skin dry using paper towels to absorb any excess moisture.
3. Next, use your fingers and slide them between the chicken skin and the meat of the bird, being sure to puncture the thin membrane between the two without breaking the skin and ripping it. Flip the bird around to do the same along the front of the chicken and also with the skin on the chicken legs.
4. Next, season the cavity and the outside of the chicken liberally with salt and pepper and rub into the skin. Then, using your fingers, take globs of butter and slide it between the skin of the chicken, pushing it down as far as it can go and spreading it evenly from the outside. Do the same along the chicken legs, the thighs, honestly where ever you can get that butter, using about 1/2 cup.
It will melt, it will make the skin crispy and then will eventually absorb into the meat to make it super tender. (drool) Leave at least 1/4 of the butter for the outside of the chicken skin and rub alllll over. Get in there and dont be shy. But then go wash your hands REAL well. You can lightly re-season the buttered bird (I added more pepper!)
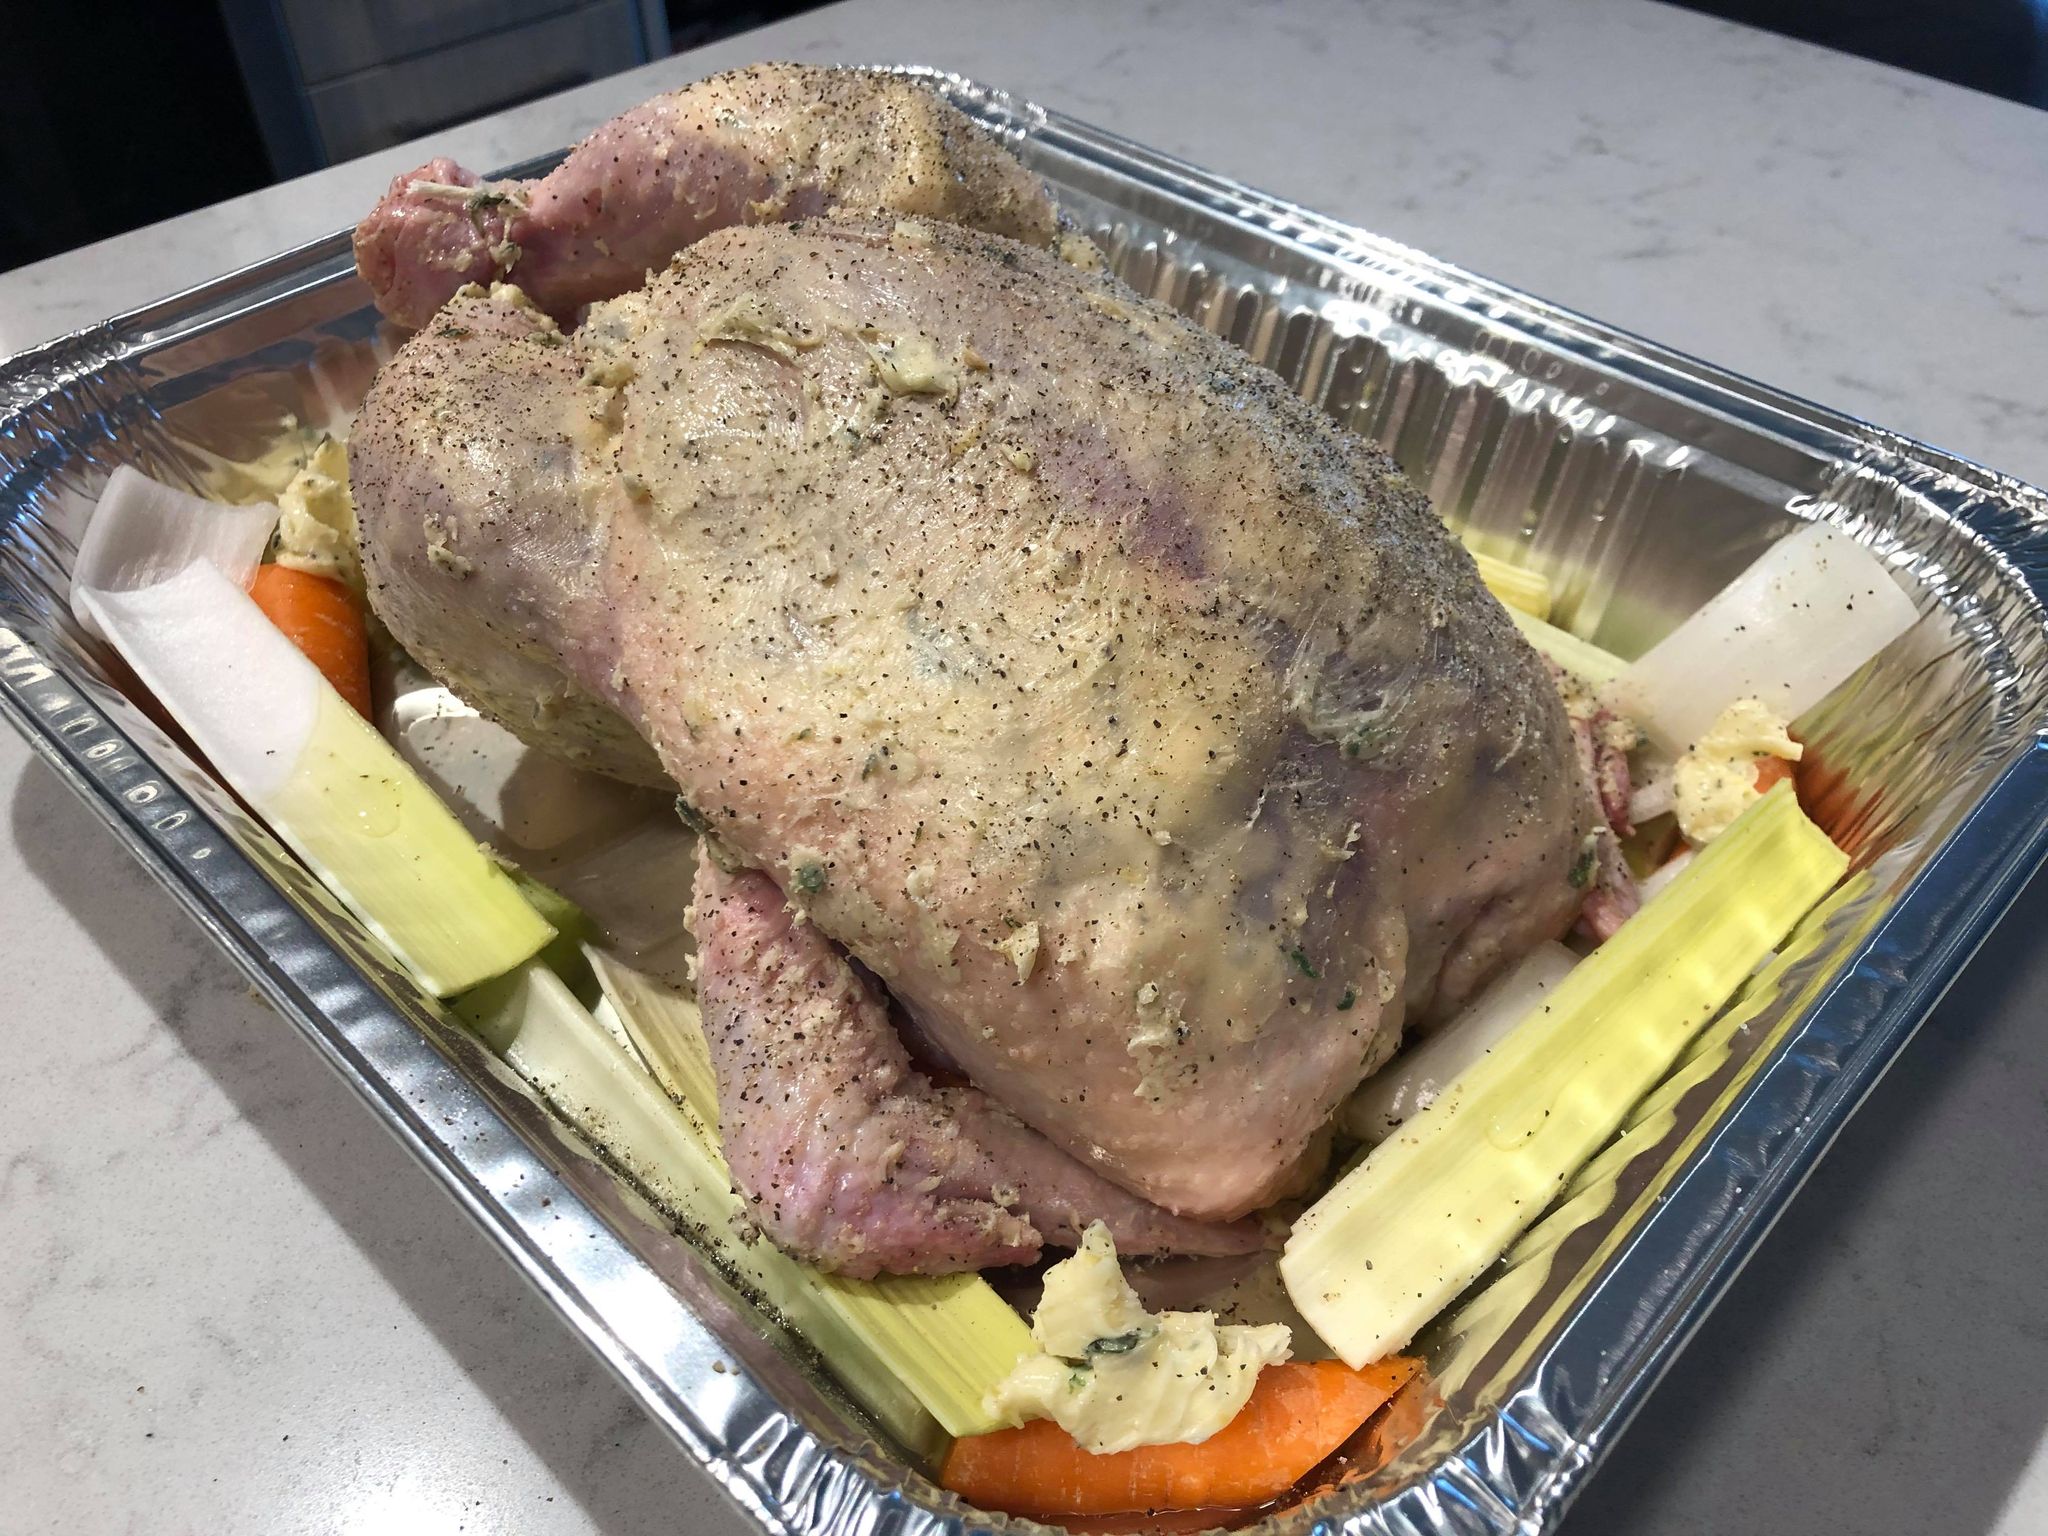
5. Finally, put a few quarters of the onion, and the quartered lemon pieces within the cavity of chicken — throw a small bunch of thyme in there as well to intensify the flavour. Re-tie the chicken legs back together with kitchen twine and then nestle the bird into the nest of vegetables you’ve laid out in the roasting tray.
6. Roast in the oven depending on the weight of the chicken! This is super important. My chicken was 3.3lbs so I roasted that bird for 2.5 hours. I flipped it around at the 1hr mark to ensure even browning on all sides of the chicken.
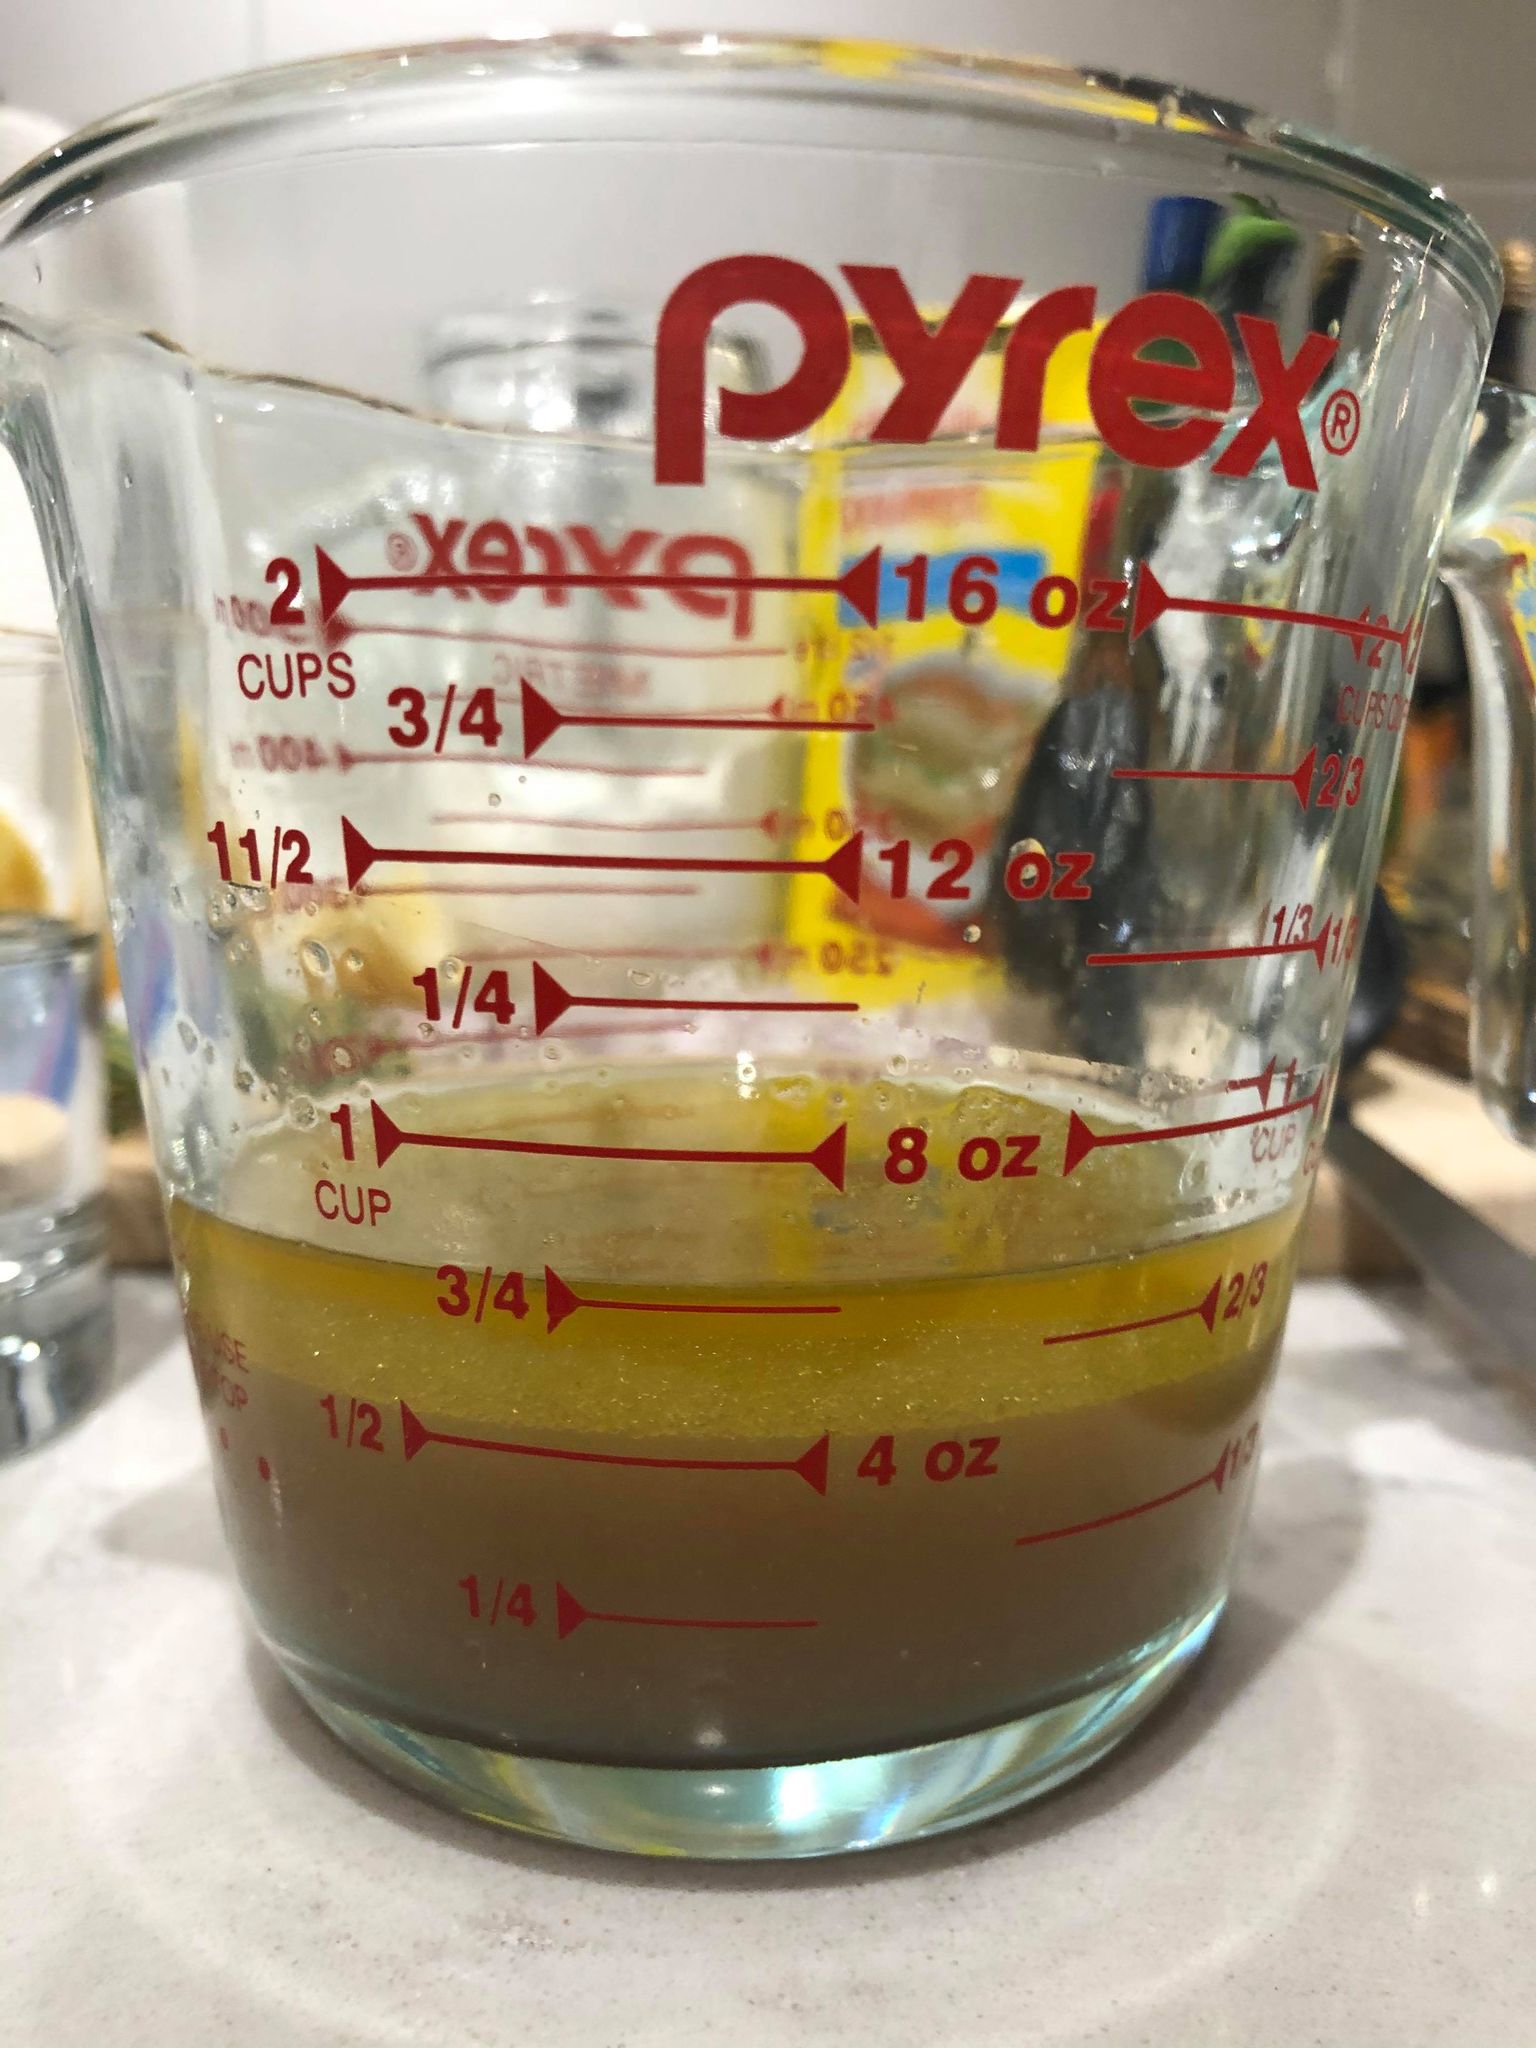
In the last 30 minutes of cooking, remove from the oven and using a ladle, collect the liquid that has accumulated at the bottom of the roasting ray. SPOILER, THIS IS FOR THE GRAVY . Try to reserve at least 3/4 cup to 1 cup depending on how much there liquid accumulates. You still want to leave about 1/4 cup of liquid in the bottom of the tray as it helps keep the chicken tender while it continues to cook for the last half hour.
There is no need to separate the oil retrieved from the butter in this liquid since it will actually help the gravy come together perfectly.
7. After the entire cook time has passed, remove the chicken from the oven and check the internal temperature of the chicken leg joint to make sure it is cooked to 180ºF to 185ºF. Allow the chicken to cool for 15 minutes before slicing into it. Remove the onions, lemon, and extra thyme from the cavity and discard.


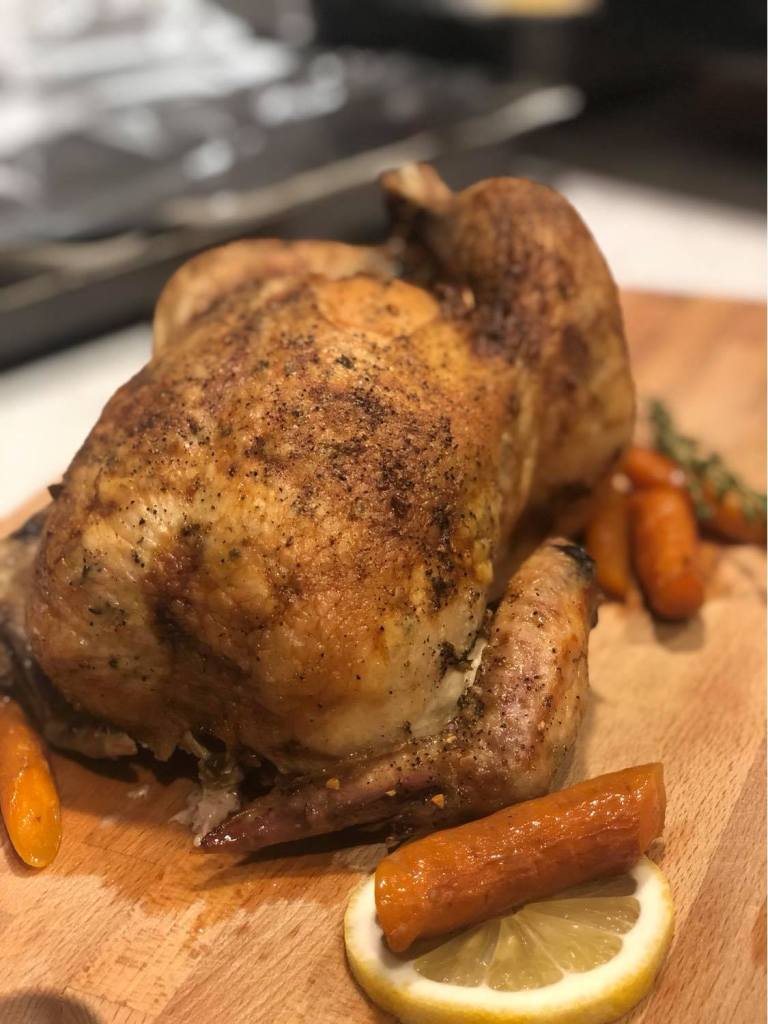
While you wait?? Go ahead and make the most delicious homemade gravy from scratch with the drippings. I also recommended this Australian chardonnay as a pairing for this meal – it hit the spot!
Peace and good eats, -A❁

So Alicia, this would be a first for me with putting the rub under the skin of the chicken but my mouth can already taste the outcome, moist and flavourful.
It adds a bit more work in the prep stage, but so worth it!!